
Many people receive orchids as gifts but are unsure how to care for them.
I was given my first orchid as a leaving present and have been fascinated by them ever since, I now have 8!
They have a bad rep as difficult to look after, but once you nail the basics of orchid care they are actually very low maintenance due to their low water needs.
In this article we will book at orchid care for beginners, and keep it nice and easy.
First we will look at some information to help you understand the orchid’s growth requirements, but if you want to skip that and look at our quick tips for orchid care you can just skip to the pink section at the end.

Understanding Different Types Of Orchids
Before we look at orchid care, it is good to have an idea of the different types of orchids. The three main categories are:
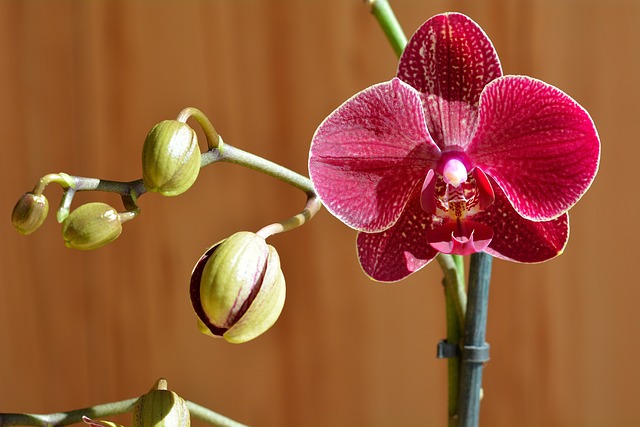
- Phalaenopsis Orchids (Moth Orchids) Known for their large, vibrant blooms and ease of care, Phalaenopsis orchids are perfect for beginners and this article is based around care for this variety.
- Cattleya Orchids With showy flowers and a variety of colours, Cattleya orchids require more sunlight and airflow than Phalaenopsis.

- Dendrobium Orchids Dendrobium orchids feature tall, cane-like stems and produce clusters of colourful flowers. They thrive in bright, indirect light.

Where Do Orchids Come From?
It is helpful just to briefly look at where orchids grow in nature, as this will help when trying to recreate these conditions at home.
- In the wild, orchids mainly live in tropical regions where conditions are warm and humid.
- One of the most interesting characteristics of orchids is that they are “epiphytes“.
- Unlike normal plants that grow in soil, epiphytic orchids anchor themselves to other plants or surfaces, such as trees, rocks, or even telephone wires, without parasitizing their host (this means they do not take nutrients from the host, unlike mistletoe for example).
- This unique adaptation allows orchids to access sunlight and nutrients in environments where soil may be scarce or unsuitable for growth.
- Their roots, known as aerial roots or velamen roots, have a spongy outer layer that absorbs moisture from the air and collects nutrients.

- The roots also provide stability by anchoring the orchid to its host and allowing it to absorb water during periods of rainfall.
- There are other orchids that do grow in soil too, the UK has such native varieties, however these not grown as house plants.
Understanding this aerial lifestyle is fundamental to successfully keeping orchids as houseplants.
- When growing orchids at home, it’s essential to replicate their natural habitat as closely as possible.
- Providing a well-draining potting medium that mimics the airy structure of their native environments, such as a mixture of bark, sphagnum moss, and perlite, is crucial for healthy root growth.
- Also, orchids require lots of airflow around their roots to prevent rot and maintain optimal moisture levels.
- It is normal for the roots to come up out of the pot.
- Proper ventilation can be achieved by using slotted pots or placing orchids in baskets that allow air circulation.

Sunlight Requirements For Orchids
- Proper lighting is crucial for orchid growth and blooming.
- If you think of the orchid sat in a tree, it will be in the shade of the tree for most of the time, perhaps with some glimpses of sunlight as the leaves move in the breeze.
- Most orchids prefer bright, indirect light. Place them near an east or west-facing window where they can receive good sunlight without direct exposure.
- If your house is too dark, you can use grow lights designed for orchids.
- Once you have found a good location and the orchid seems happy, don’t keep moving it about, just leave it there.

Watering Orchids
Watering is another critical aspect of orchid care. Unlike traditional houseplants, orchids have unique watering needs.
Basic Orchid Watering Guide For Beginners:
- Allow the orchid’s potting medium to partially dry out between waterings.
- Overwatering can lead to root rot, while underwatering can cause dehydration.
- You only need to water the orchid about once every 2 or 3 weeks – if that.
- Look at the roots – if they are green you do not need to water. If they are silvery grey you need to water.
- Water the orchid early in the day to allow excess moisture to evaporate and prevent fungal diseases.
- Use room temperature water (ideally rainwater) to avoid shocking the orchid’s roots.
- Don’t use ice cubes. Some people swear by this method but the cold will stress the roots.
- Avoid wetting the orchid’s leaves, and don’t allow water to sit in the recesses of the leaves as this can promote fungal growth.
- Instead, water directly into the potting medium and allow to drain through.
- Or (and this is what I do) fill the outer pot with water and submerge your orchid to root level, no more.
- Allow to sit for about 10 minutes.
- Take out the inner clear pot and allow to drain for a further 20 minutes, make sure there is no water sat in the bottom of the pot.

How To Get An Orchid To Rebloom
Most people will purchase or receive their orchid when it is in full bloom.
After a few weeks the flowers will wilt, dry up and fall off.
This is normal and you can still keep the orchid until if flowers again – don’t throw it away.

Steps To Make Your Orchid Rebloom
Step 1: Remove spent flowers and cut spike if necessary: If the flower spike is still green leave it, you may see more flowers grow from the end. If there are no more buds forming you can cut the green stem one inch above the node before the existing flowers. If the spike turns brown cut it off near the base. If you have two spikes you can cut one at the base and leave the other.
Step 2: Provide a period of rest: Flowering uses up a lot of energy and it is necessary to allow your orchid to rest for some time after it has bloomed so it can gain the energy to flower again. Mimic their natural environment by reducing watering frequency and slightly lowering the temperature for a few weeks.
Step 3: Provide adequate light: Ensure your orchid receives enough indirect sunlight to stimulate flower production, too little light will prevent flowering.
Step 4: Maintain proper temperature: Most orchids prefer daytime temperatures between 65-75°F (18-24°C) and slightly cooler temperatures at night to trigger blooming.
Step 5: Use orchid-specific fertiliser: Regular feeding with a balanced orchid fertiliser can provide the necessary nutrients for healthy growth and blooming.

How To Make Homemade Orchid Fertiliser
Creating your own orchid fertiliser from household ingredients is not only cost-effective but also eco-friendly. Here’s a simple recipe using common kitchen items:
Ingredients
- 1 cup of milk (whole or skim)
- Crushed eggshells from 2 eggs
- 1 ripe banana peel
- Used teabags (3-4)

Instructions
- Combine the milk, crushed eggshells, banana peel, and used teabags in a blender.
- Blend the ingredients until they form a smooth liquid.
- Allow the mixture to sit at room temperature for 24 hours to ferment.
- Strain the liquid to remove any solid particles.
- Dilute the fertiliser with an equal amount of water before using.
- Apply the homemade orchid fertilizer to your plants every 2-4 weeks, adjusting the frequency based on your orchid’s needs.
Quick Tips For Orchid Care
Sunlight – No direct sun, but a bright aspect, warm, ideally no drafts.
Location – Once you have found a place the orchid likes, leave it there.
Watering – Water only when the roots are silvery grey, don’t water when they are green. Water by submerging the clear pot in tepid rainwater and leaving for 10 minutes. Then allow all water to drain out.
Flowering – Most orchids will flower for months, then the blooms will dry and fall. This is normal. Cut the spike to the base if brown. If the spike is still green then leave it for a bit to see if you get more flowers. If not cut 1 inch above the last node before the previous flowers. Allow a period of rest, a few weeks with less water and lower temps.
Potting Medium – Use orchid bark and replace this after a year or so as it will start to degrade and hold more water.
Fertiliser – Use a balanced store bought orchid or homemade fertiliser, if you are using general plant fertiliser then dilute it to about 25% fertiliser to 75% water. Apply every now and again as new leaves appear.
Conclusion
Orchid care may seem daunting at first, but with the right knowledge and approach, anyone can successfully grow these gorgeous and unusual flowers.
Don’t be scared or put off, follow our simple tips and you can enjoy blooming orchids for months on end. Is your orchid ill or dying? Check out our article on how to revive a dying orchid.